Introduction
For the first time I faced such a phenomenon as a version control system during the process of creating my own website. New ideas appeared all the time during the development process, and each new version I had to hold in different folders on the hard disk that soon led me to utter confusion, especially when I had to come back to the code in 2-3 days. Enormous amount of time was spent on determining which version was the latest (active) and all the related minor, but important issues. This way search for a solution and familiarization with Git began.
A bit of theory before proceeding to the description of the product itself.
A brief official summary about the product
Git is a distributed version control system for files. It was created on the 7 of April, 2005 by Linus Torvalds for Linux cores development.
Version Control System or VCS is a software product that allows to store multiple versions of the same document, if necessary, go back to earlier versions, determine who and when made a particular change, and so on.
Git is a distributed version control system that enables its customers not just to unload the last versions of the files, but to copy the entire repository. Therefore, if the production server dies, any client-side repository can be copied back to the server to recover the database. Every time a customer picks up the latest versions of the files, he creates a complete copy of all the data. Git also allows to work with several remote repositories, so one can work simultaneously in different ways, with different teams within one project. This way one can simultaneously maintain several types of workflows in one project.
Installation and system requirements
Want to tell beforehand that I use Windows, and all the presented below material will be explained in the context of this operating system.
So, the installation:
- Go to the official site and click the Download for Windows
- Run the downloaded .exe file
- Then install Git following the installer prompts
- That is all
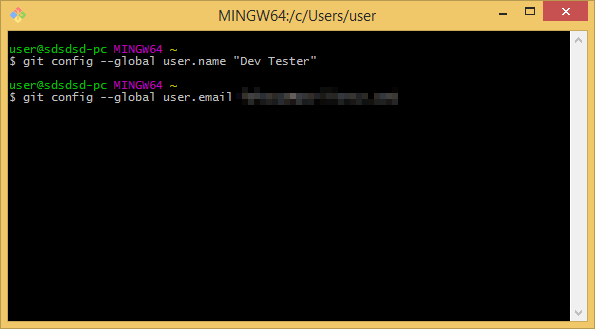
When Git is installed on the computer one can proceed to work, but before that, it is recommended to customize Git. One should begin from git config – Git utility function allowing to customize the parameters that control all aspects of Git. Run the Git Bash and start with entering your name and e-mail address.
$ git config --global user.name "Your Name"
$ git config --global user.email yourname@example.com
The function word “global” means that this setting is global, and Git will use these data for everything that you do in the system. If you want to specify other name or email for certain projects, you can run this command without global option in the catalog with the desired project.
The workflow is the following
Now let’s review all the basic commands needed for solving the vast majority of problems encountered when working with Git.
To start working with a repository on your PC you need to acquire it. There are two ways of doing that: to import an existing project in Git or to clone an existing project from a server.

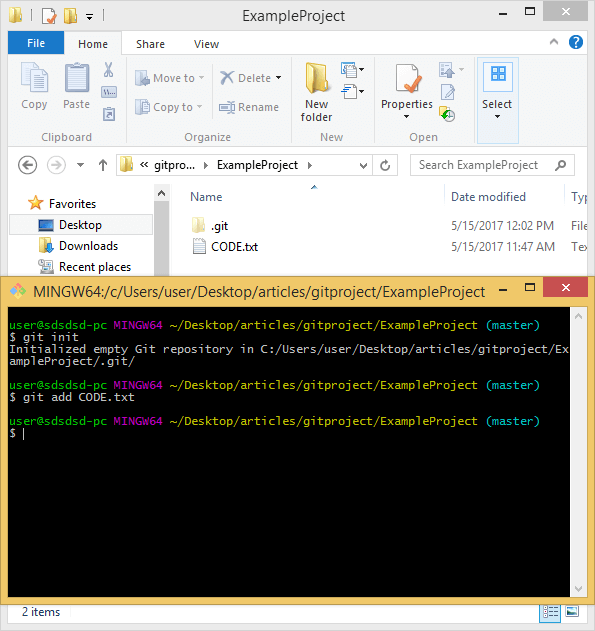
We will work with an existing one. Open a folder with a project and click the right mouse button in its free area, then click the "Git Bash Here" section which opens the console. Here enter:
$ git init
This command creates a new subdirectory named .git in the existing directory. The new subdirectory contains all the needed repository files (the folder containing the directory is hidden).
To add files from a directory under version control they need to be indexed by running the command
$ git add
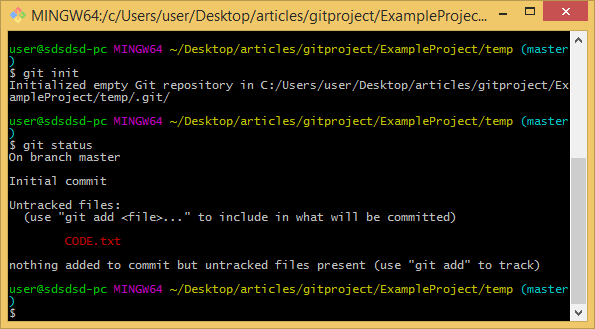
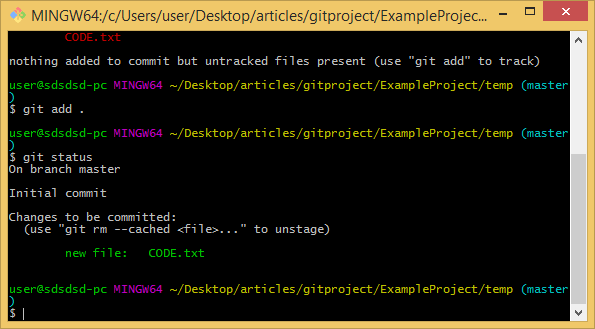
To simplify the explanation let’s do as follows: suppose you opened the folder and initialized it as a git repository by running $ git init. As long as the folder is empty, and the files are not indexed, the directory is considered empty. Now let’s create an empty text document “test.txt” in this folder; to make Git track the file, the file must be indexed. First of all, prompt for the status (probably this command runs more frequently than any other)
$ git status
The following answer will be received:
Initial commit
Untracked files:
 (use "git add ..." to include in what will be committed)
       test.txt
nothing added to commit but untracked files present (use "git add" to track)
That is now we execute what we discussed
$ git add .
(if it is necessary to track a certain file - $ git add test)
Dot at the end of the command means that we want to keep track of all the files in the repository, and we will request the status, the response will be:
new file: test.txt
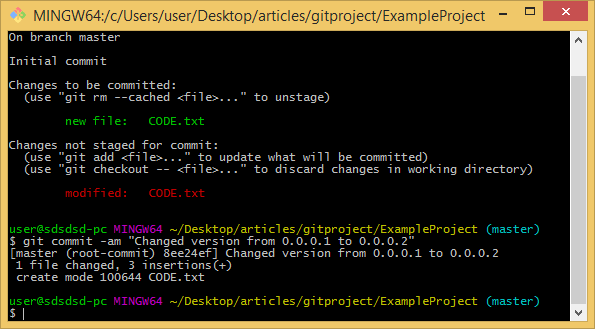
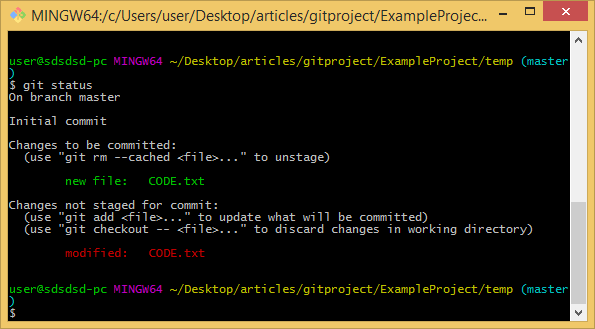
Now test.txt is indexed, let’s make changes and add any text in it (E.g. Hello!) and request the status again. Git will inform that the file was modified:
modified: test.txt
It's time to add the first commit. Here enter:
$ git commit –a
After that we browse to a separate menu (Vim editor) where you will be asked to enter a message for the commit for your changes.
You can also skip this step by entering the message itself next to the command:
$ git commit -am “my commit message”
Once it is done, enter the status command again. You should see
$ git status
On branch master
nothing to commit, working tree clean
Which means that everything is done and the changes were successfully made, with your message.
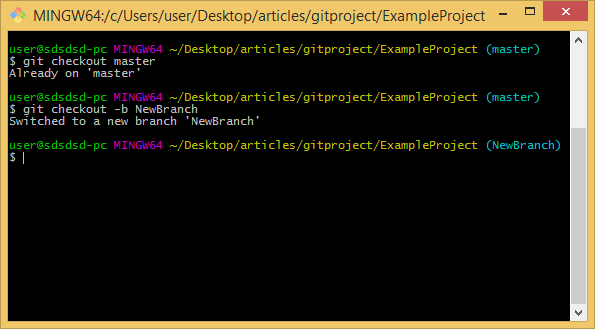
If you want to create a new branch (software branch) in the current project for testing new experimental functions, firstly, you need to take out the changes from the master server during the "polishing" of the current version.
$ git checkout master
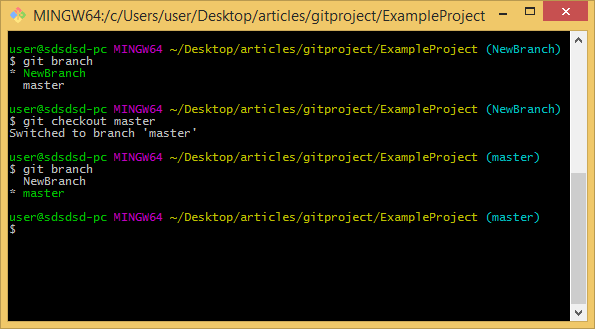
The system should inform that you are already on the master branch. Now enter:
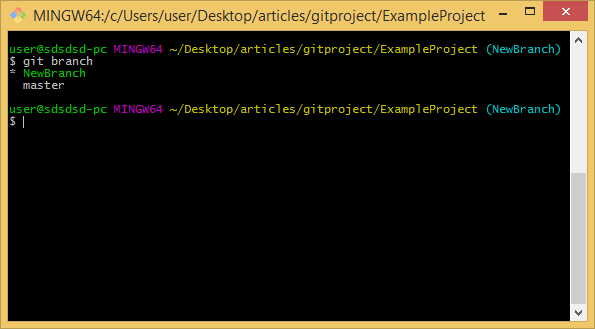
$ git checkout -b Your_Branch_Name
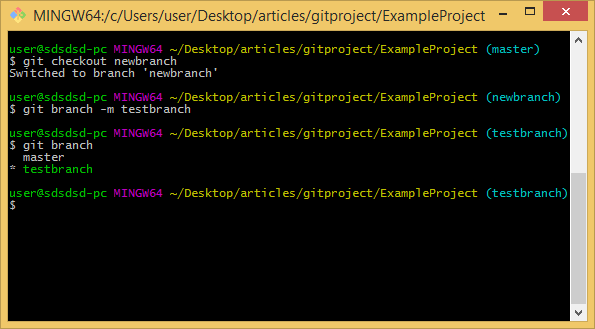
With the help of this command you will not only create a new branch, but also automatically go to it. To make sure that you are in the desired branch now and look through the names of all existing branches, you should enter:
$ git branch
Your current allocation is highlighted in green. To go back to master-branch enter:
$ git checkout master
$ git branch
Let's make a copy of our file, named "testcopy.txt" and save it in a new branch. After copying, we enter
$ git checkout Your_Branch_Name
$ git add testcopy.txt
$ git commit -am “new copy”
And when going to master-branch, we see that the files in the project folder were moved, as they belong to a new branch of the project now. All the files, entered and edited in the new branch, won’t affect the main, «root» branch of the project.
To rename the current branch, where you are located, enter
$ git branch -m Your_New_Branch_Name

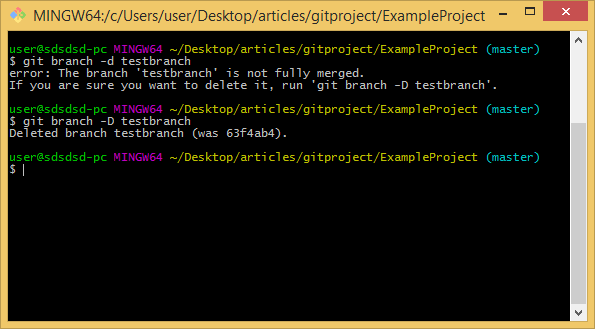
To delete a specific branch, you should enter
$ branch -d Your_Branch_Name
If there are current processes in the branch or it is not already merged with the current version of the project, then we should enter
$ branch -D Your_Branch_Name
This command will delete the branch despite the current processes and the state of the branch itself.
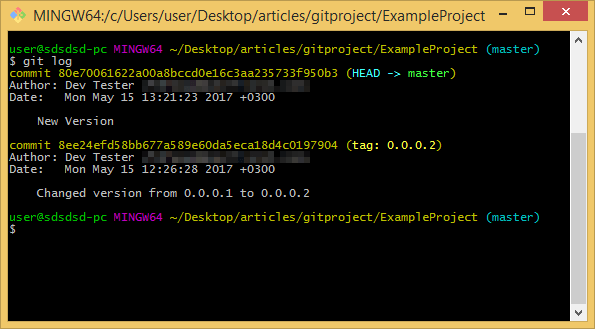
The program also maintains a log of changes which can be viewed by entering
$ git log
The log stores information about all the commits, and is also a convenient source for searching the commit ID to assign tags to certain commit. To add a tag name, enter
$ git tag Your_Tag_Name Commit_ID
Usually, assigning tags are given the names of project versions, or certain functions being developed in individual branches. And all the assigned tags are visible in the log.
If something went wrong, you can replace the changes in the operational branch with the previous content version:
$ git checkout -- test.txt
Added to the index changes, as well as new files, will be saved.
Comparison with the competitors
Git is a free open source utility that was created for easy use without losing additional functionality comparable to competitors in the VCS environment. It is designed to have the edge over other utilities like Subversion, CVS, Perforce, ClearCase and the rest with functions like "cheap local branching", сonvenient environments for staging and many types of work processes. It is also convenient to work with the online repository, GitHub which allows any user to view the history of project versions and download specific versions or branches.
Personal impressions
The utility is very friendly to the user, who does not want to waste the time in search of the documentation. If the commands are written incorrectly, it will tell you how to enter them or hint to existing ones from the list. Free distribution and access to almost all operating systems for a personal computer allows any user to work on the project anywhere and as you wish.
Summary
Simple, convenient, easy-to-study tool. I recommend it to everyone, both beginners and experienced developers/teams.
About the Author - Vasyl Voronoy, QA Team Lead at TestMatick
Vasyl Voronoy is QA Team Lead in TestMatick company. He has advanced background in the field of quality assurance, test methodologies. As QA Team Lead he participated in testing various Websites, Web applications and Mobile applications, created for different goals, such as Finance, Advertising, Medicine, Media & Entertainment, E-Commerce, Games, etc.
You can find out more about TestMatick company at www.testmatick.com.