We've been working hard over the past months to bring a new ClickHelp version to the documentation teams using ClickHelp. We have made conditional output more straightforward, improved the WYSIWYG editor a lot to make it easier to use, made the branding functionality more powerful with a ready CSS example to use, and much more. We hope you will love those changes, just like we do! You can find a full what's new document here.
Ready Home Page Designs
To make your life a little bit easier, we have developed seven ready Home page designs you can use out of the box. All of them are very different and they demonstrate various approaches to the portal Home page design. Click the preview images below to open a full-size version of a screenshot.
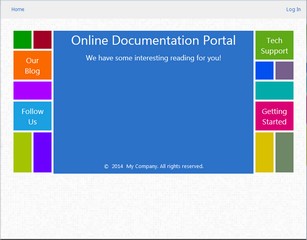
Tiles Template
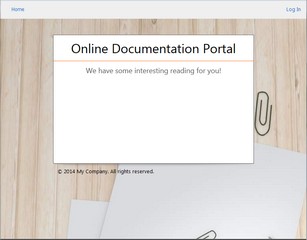
Wood & Paper Template
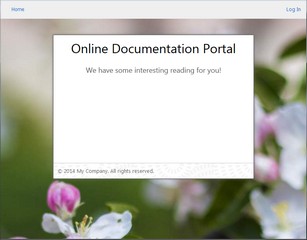
Spring Blossom Template
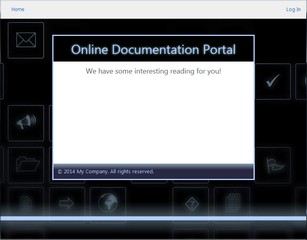
Neon Contrast Template
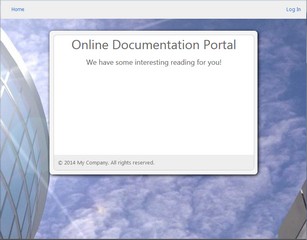
Enterprise Template
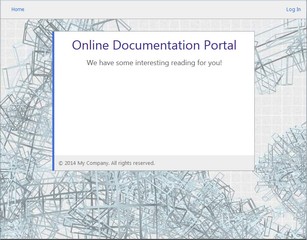
Blueprint Template
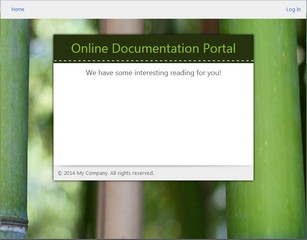
Eco Green Template
You can easily switch among those ready design templates using a small combo-box at the top of the Home page. And you can modify any of those designs by changing their HTML source in your portal settings. What's your favorite template? Share your feedback in the comments below!
Better Branding
We have always been saying that online documentation must be beautiful. Starting with this release, your online documentation portal can be even nicer. ClickHelp always had the feature of branding the portal Home page - you could use any HTML code on that page, making it look the way you need.
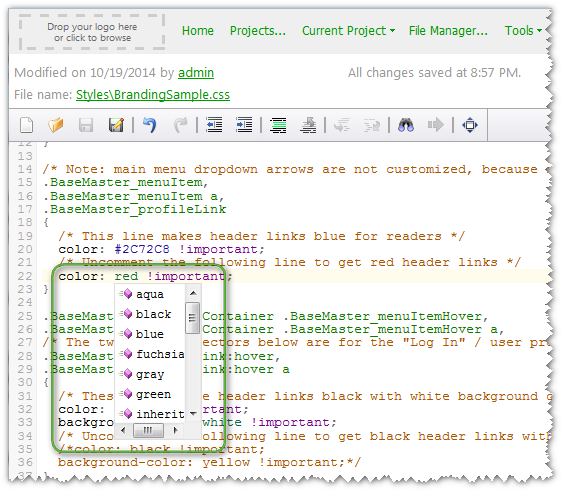
In the new release, we went further and made it possible to brand the header and footer of all reader-facing pages of your documentation portal. The header is the panel at the top, where you put your logo. Now you can make it look different, matching the overall style of your portal. The real flexibility of this new branding function is achieved through using a custom CSS file. Yes, we know that many ClickHelp users are not CSS professionals, and that's why all new portals now have a ready branding file with a lot of well-written comments. You just take that file, and follow the instructions there - uncomment certain parts to apply changes: background color and image, link color, link hover style, etc. All CSS selectors are already there, and all you need to do is adding a few style attributes.
To learn more about the branding functionality, check this help topic.
Simpler Topic Links
Oh, this one is really nice! Now you have full control over the project and topic links. With this change, you can now get the topic link before actually publishing it, and use that topic link in your application being developed to reference help topics. All you need to do is to change the project ID in the link you see in the address bar with a publication ID. Those identifiers are alphanumeric strings - you can specify the identifier you like when creating a publication.

Above, is a link to the Introducing ClickHelp topic in the product documentation. As you can see, there are two identifiers there: "clickhelp-documentation" points to a specific publication, and "introducing-clickhelp" points to a topic of that publication. It's easy!
Smart Links for Topics
On top of the simplified link structure, ClickHelp now support Smart Links. For this type of links, you don't have to know the publication name - they will always point to the latest published version of a topic. These links contain only the topic identifier. When a reader follows such link, ClickHelp will automatically find the latest version of the topic and redirect the reader there.
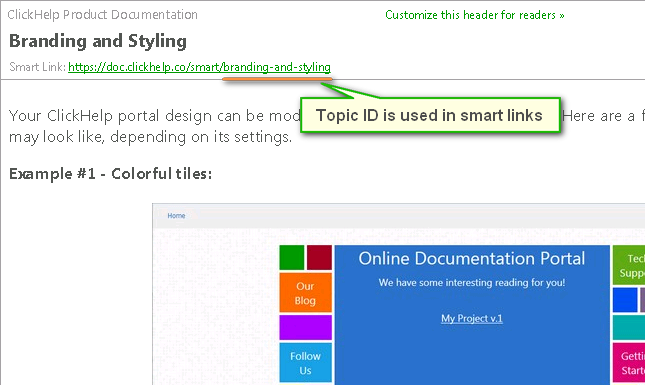
Smart links will help you keep the topic links working even if you publish a new manual, and have to change the publication identifier to keep the old version available.
Conditional Table of Contents
ClickHelp implements a number of single-sourcing techniques for documentation authoring. With this release, you have a new powerful feature - include or exclude TOC nodes depending on the output tag used for publication. When you open the topic properties screen, you will see how easy you can control the publishing of every single topic in your Table of Contents.
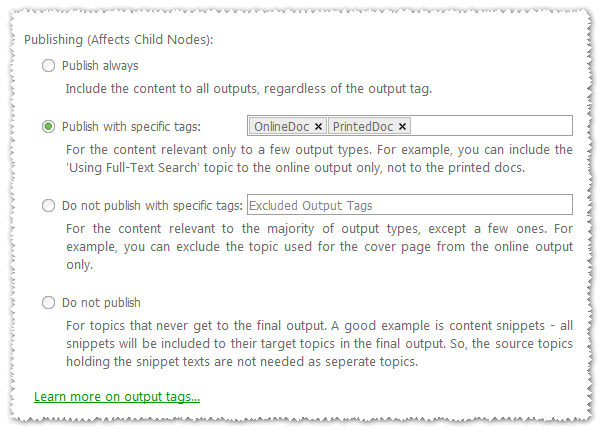
This means that you can produce multiple different manuals from the same project - all you need is to specify which tags include a TOC node, and which don't. Here are a few examples of this functionality usage.
Better reader targeting. From the same project, you can produce an Admin Guide, Installation Guide, Operator Guide, Product FAQ, and a Full Product Manual that includes all those parts.
Multi-language online manuals. Create a root TOC node for every language. Use the "Publish with specific tags" mode to bind every root node to one output tag that identifies the language. After publishing, you will have several language-specific manuals, and a convenient language selection option at the top.

Visual Anchors
Anchors are used in context help links. Instead of giving a link to a large topic, you can give a link to a specific place in that topic - this makes it easier for the reader to find the right section. When someone follows an anchor link, the topic will automatically scroll to the anchor location. On the screenshot below, you can see how anchors look like in the editing mode, and in the Insert Link dialog. For readers, anchors are invisible.
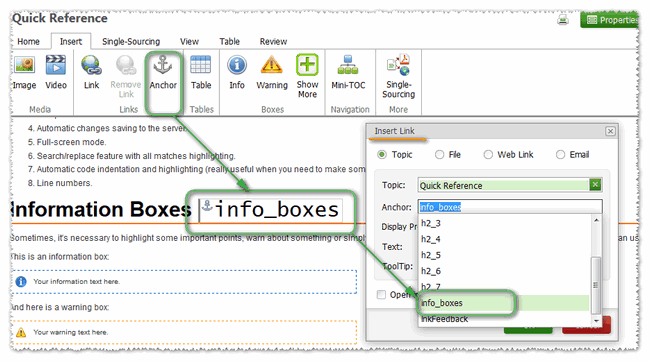
When you need to give someone an anchor link, you can easily get it by adding two parameters to a topic link - check the image below.

There are more improvements in this ClickHelp version - check a complete list here.
Happy Technical Writing!
ClickHelp Team - Online Documentation and Technical Writing Tools